Saturday, October 27, 2012

Rainbow Brite family costumes

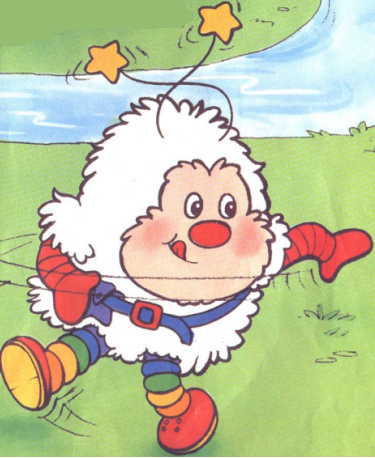
It's TWINK!  My daughter's costume is complete, and boy was it a hit!


You can find the tutorial for the body of the costume and the headband here.  
The belt tutorial is here.  The rainbow leggings were a bit of an experiment.  
I tried coloring them with markers, but it all washed out and looked pretty shotty.  
A friend recommended fabric paint.  I owned some textile medium that changes 
acrylic paint in to fabric paint so I gave that a try.  It works really well, but fabric paint isn't 
made for fabric that is going to be stretched.  It would be easier to buy some 
rainbow leggings, but you can do it however you want, haha.  


  Here is my husband's costume.  He is Murky Dismal, the villain from Rainbow Brite.  I didn't do a step by step tutorial for his costume but it was pretty simple.  

I found a long sleeved plain gray t-shirt at Goodwill.  You could even get one with something printed on it and wear it backwards because the cape/vest will cover the back.  I printed off a lighting bolt shape that I liked and cut it out with fabric and iron on fusible webbing.  I just ironed that straight on to the shirt.  I decided to sew some white fabric around the bottom of the shirt, but you could glue white felt and achieve the same effect.  For the cape/vest, I did more work than necessary.  Just make a cape.  It's a lot easier.  On the back of Murky's cape, there is a cloud with a lightning bolt.  You can see it by watching a snippet of a Rainbow Brite episode.  I drew a cloud shape on felt and used more fusible webbing to attach it and a lighting bolt to the back.  For the hat, I found a really cheap and ugly ballcap.  If you're going to throw one away, that would be the perfect candidate!  For the "needle" on the top of the hat, I used toothpicks and tape to make the shape I wanted.  I hot glued it right on the button you find at the top of a hat.  Cut the bill off, and then attach felt.  I used hot glue and it worked fine.  The felt will be kind of bunchy in some places but you can cut it and overlap it at those points.  For the final touches, attach the darker gray pieces, two lighting bolts on the sides, and a white puff ball on the top.  A cotton ball would work fine, but I used a white pom pom ball.  Paired with some black pants, this costume was complete!


So there you have it.  A Rainbow Brite family.  Here's some more pictures, just because :)


I'd love to see how your costumes turn out, so leave a link to your 
blog or pictures in the comments. 

Saturday, October 6, 2012

Twink costume belt

The Twink costume is almost done, so it's time to add the final touches.  Today, I tackled the belt.  I already owned a basic blue belt so that is my base.  If you've ever searched for pictures of Rainbow Brite or other characters in the show, they are all different!  At first glance, they all appear to be the same, but there are subtle differences in the colors and patterns.

Take Twink for example.  In this picture, his belt is red with a yellow buckle and one blue pouch.  In this one, his belt is blue with a red buckle and a purple star pouch.  And in yet another (this picture), his belt is blue with an orange pouch AND a purple star.  Since I own a blue belt, I decided to go with the last one. 

Supplies needed: 
  • orange felt
  • purple felt
  • yellow felt (optional for small star on pouch)
  • blue belt
  • red felt
  • stabilized felt (if that's what it's called.  It's stiff) 
  • iron on/seam tape
I started with the orange pouch.  
I didn't measure anything, but I had a basic size in mind.  
Here is the shape I began with.  It's looks like a banner.
I added the star because some pictures show the pouch with a star button.  
Fold it to the size you want the pouch to be and crease it so you will know exactly 
where to fold it when ironing it.  
Place the belt where you want it to go.  The iron on seam tape only goes up part of the way so the belt can be looped through.  Remove the belt and iron the sides to fuse them.
Add a piece of seam tape to the tip of the pocket flap and the front to make the pouch.  
It won't be usable, but it's just for show anyway.  Iron that.
Your pouch is done.  Now for the star pocket.  
Start out with these two shapes; a star with one point missing and a house type shape.  
The house part of mine wasn't long enough so I would suggest making yours a little longer. 

Use seam tape to attach the two pieces together in this position.  
After you iron it together, flip it over.  

This is where I had to improvise a little.  I used seam tape to attach another piece of felt to the back of the star.  If you made your tab long enough, you won't need that piece.  
This is the loop for the belt to go through. 

The last thing I wanted to add was the belt buckle.  Felt is pretty flimsy so I used some stiff felt and used seam tape to attach the red felt to the stabilized felt.  


The buckle is about 2 inches by 2 inches.  I rounded the corners and used an exacto knife to cut the slits for the belt to go through.  They are about 1 cm from the edges of each end.  That's it!  Slide all three pieces on to the belt and you're done.  


Friday, October 5, 2012

Twink costume body and headband

I made a Rinbow Brite costume a few years ago and just knew my daughter 
had to be Twink so I could wear it again.  I think she rocked it!  


If you found this tutorial, my bet is you saw this one at some point.  
That picture is where my idea to put my daughter in a Twink costume was born.  
I got the same fabric as she did, but I am NOT a pattern purchaser.  
They're not expensive, but I think the craft woman in me refuses to 
follow a pattern.  So, I improvised. 


This is the basic part of Twinks outfit.  As I said, I didn't buy a pattern.  I also didn't want it to be too puffy, but you can certainly add fiberfill on the inside if you do want it puffy.  
I would add 2 inches to the fuzzy fabric if you're going to go that route.

I started out with an outfit that is a tad big on her.  
Fold it in half and place it on top of two pieces of paper, taped together.  
Trace the outfit and cut out your pattern.


As you can see, I made it shorter and a little wider.  
The outfit pictured goes past my daughter's knees so I guessed on the length.  
As far as the width, I added a little for seam allowances.  You're going to need 2 pieces 
for the front (one fleece and one fuzzy fabric) and two for the back as well.

After you get your pieces cut out, pin one piece of fleece to one 
piece of the fuzzy fabric with the fuzzy/furry stuff inside.   
You're only going to sew the bottom, the arm holes, and the neckhole.  
Leave the sides and shoulder straps open.  This is VERY important! 
 I didn't do it that way so my pictures won't be too helpful, but after my trial and error, I know that would be the best method.  Moving on...


Flip your fabric right side out and do the same with the other half of your dress.  
You should have two panels with fleece on one side and fuzzy/furry fabric on the other.  
If you want to fill it with fluff, now is the time to do that. 
Pin the shoulder straps and sides together with the fuzzy/furry material facing each other.  Sew the sides and the shoulders together.  
Flip it fuzzy side out and you're done!  
The seams will be on the inside so they won't show.  
Fleece doesn't fray and neither does the fuzzy fabric.  
Just one straight stitch seam should do the trick.  

After that, it's all about the accessories.  I owned this blue belt already.  
I still need to add the star and pocket to the belt, but that won't be too difficult.  
Just a little bit of felt should do the trick.


The linked costume has a headpiece that most people have tried to copy; a hood if you will.  My daughter will not tolerate such a thing.  No way, no how.  She loves wearing animal ears though so I figured a headband would be right up her alley.

I bought a set of headbands from the dollar store.  
I had some red chenille stems/pipe cleaner.  I used 4 total, 2 for each side.  
Take two stems and twist them together all the way down to the bottom.  
Fold them in half and twist all the way to the ends.  Go back to the end you folded and untwist it a little. I used two colors to show it a little better.
Now you just slide that over the headband and glue in place.
After the stems were in place, I used hot glue and glued my fabric remnants to the headband, folding the ends to the underside and gluing those as well. For the stars, I printed off this template and cut 4 stars out of felt.  I sewed 2 stars together leaving a little space for them to slip over the chenille stems.

It helps to use scissors or something else to open up the hole.  Then slip it over your chenille stem and sew the hole closed.  This will also secure it to the stem so you won't need glue.


Here is the belt tutorial.  The rainbow tights were trial and error.  If you can
 purchase some, that would be much easier!  I actually painted hers with fabric paint.

She got a ton of compliments and just looked perfect!


Fixing broken animal headbands/ears

It's happened more times than I can count... the pretend animal ears are left on the floor and CRUNCH!  Someone (usually my husband) has stepped on said headband and it's a gonner.  It's October so at least we can replace them right now, right?  
Unfortunately, the answer is no.  Sure, I could go buy a new pair of Tiger ears for my daughter but the quality of the costume headbands has diminished a lot in the past few years.  What's a crafty girl to do? 

My original solution was to cut off the ends of the fabric, break the headband as close to the animal ears as possible, and slide elastic through.  It works pretty well but my 18 month old can't put the ears on by herself and they tend to fall in her face over the course of her playtime.  When it was just the bunny ears, I was fine with that.  They were a dollar store find.  But when the Tiger ears broke 2 days ago, my heart broke too.  Okay, that's a little over-dramatic, but I am a Memphis Tiger alumni and have had the tiger ears for years.  
It was a little upsetting. 

Fast forward to today.  I went to the dollar store to buy a headband for my daughter's Halloween costume.  The ones I chose came in a pack of 3 and are pretty flexible/strong.  
I needed one for her costume, but the other two were for animal ear repair. 


As I was tearing apart the bunny ears, it dawned on me that I could just hot glue the old headband to the new one.  Well, that was easy enough!  
I moved on to the Tiger ears and cut off the bottom fabric so I could slide the headband out.  Then I broke it as close to the ears as possible.  
The ears are actually glued to the headband or else you could slide the whole thing out. 

Add some hot glue to the top of the headband and glue your headband remnant to it making sure to keep it centered.  After that, add some hot glue to the sides and you're done!  

One fixed headband. 


And one happy toddler.


Wednesday, October 3, 2012

Candy Corn pillowcase dress tutorial


A candy corn dress?  What could be cuter?  
I saw this adorable dress on Pinterest and was inspired to make one for my little girl.  
It turned out so well that I made some for a few friends.  I just finished my final order and decided to make a tutorial in case you want to make one.  


My daughter loved modeling this dress for me.
To achieve this cuteness, you need some fabric and some time.  This took me about 2 hours.  I don't like long projects so two hours is my max!  To begin, here are a few sizes and how much fabric you'll need for them.  

18-24 months - 18" wide
  • (2) White 8 1/2"
  • (2) Orange 6 1/2" 
  • (2) Yellow 6 1/2" 

2T - 19" wide
  • (2) White 9"
  • (2) Orange 7"
  • (2) Yellow 7"
3T - 19" wide
  • (2) White 10"
  • (2) Orange 7 1/2"
  • (2) Yellow 8"
For the tie, cut a 4" wide strip that is the length of the fabric (about 44")
You'll also need bias tape (tutorial here) for the arm holes.  Now for the dress!

Lay your fabric out and iron it.  

 Lay the orange fabric over the white and pin in place.  
Sew using a 1/4" seam and then cut with pinking shears (the best tool for people who don't have sergers!) or serge/zig zag stitch the seam.


Open up your fabric and make sure the seam is on the underside.  Lay the yellow fabric over the orange and pin.  You can do a quick fabric flip to make sure the seams will both be on the inside (see second picture).

Sew that seam with a 1/4" seam allowance and use pinking shears/zig zag stitch/serger to prevent fraying.

Repeat these steps for the other side of the dress and then lay the two sides together making sure the seams are on the outside.   Pull the sides of the dress up to make sure the seams are lined up and pin the dress together leaving some space between the pins and the edge. 


Now that everything is lined up and pinned together, make a mark 2 inches in from the side on the top of the dress. 
Lay the yardstick down so that it creates a diagonal line from the mark you make down the corner of the dress.  Trace the yardstick to make a line.
I made armhole templates based on other outfits.  I'm going to try to scan them for your use, but I don't know how to do that right now.  In the meantime, trace an armhole from a sleeveless dress and add a 1/4" to the side for a seam allowance.  Trace the armhole on to the dress. 

Sew down the side of the dress on the line you made, starting at the bottom of the armhole.  After you sew both sides, cut out the armhole and use your pinking shears to cut off the excess fabric on the sides.
  

It looks like a dress now!  We have a few final touches.  At this point, I like to finish the armholes using bias tape I make.  See tutorial here.  Pin one edge of the bias tape to the inside edge of the armhole and then sew.  

Flip the bias tape over and pin in place.  Sew it as well.  Repeat on the other side.

Use pinking shears on the top edges of the dress.  Flip the dress so the seams are on the outside and then fold the top edge over (about a cm).  Sew in place. 
Fold the top over again to make about an inch tube for the tie to go through.  Sew along the line you already sewed (in the previous step).  Repeat on the opposite side of the dress.
 Get the tie fabric and fold it in half.  Perhaps you should pin it, but I never do.  Sew along the entire edge of the tie and the bottom (make sure you leave one end open to flip it). Cut off the triangle on the corner so it will make a point when you flip it.


Flip the tie, iron it flat, and fold in the top edge.  I use seam tape and iron the tube closed so there won't be stitches on the end of the tie.  

With the seams still on the outside of the dress, we're ready to make the bottom hem.  Fold over about a cm of fabric and finger press down.  Fold that over again (so the raw edge will be enclosed) and pin in place.  Sew that up!


We're done with the dress!  The final step is to pull the tie through.  Use a safety pin in the corner of your tie and thread it through the channels we made.  

Now stand back and admire your work!  This dress was a custom order for a friend of mine.  She wanted the letter "m" for her niece.  It turned out pretty cute!  Please don't take this pattern and list your dresses on etsy.  It wouldn't be fair to the original creator, or me!