What you'll need: (large) 12" tall x 10" wide or (small) 10" tall x 9" wide patterned piece of fabric
(large) 14" x 14" or (small) 13" x 12" piece of fabric for backing and border of front
two 3" x 26" strips of fabric for the shoulder straps
one 5" x 42" (or length of fabric) strip for the waist
one 2" by 14" piece of felt to stabilize waist
What size carrier should you make? It all depends on the size of the doll or stuffed animal. The larger carrier is great for build-a-bears and 18" dolls. The smaller one works really well for baby Stella and other stuffed animals.
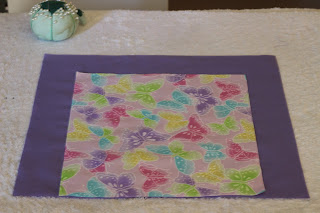
After getting your fabric cut out and ready, place the patterned piece on top of the solid piece, leaving two inches on the sides and the top.
Fold the sides in to where they touch the patterned fabric and finger press them.
Fold them over again and pin them in place.
Now that the sides are all pinned up, repeat that step with the top and pin in place as well.
Get the two shoulder straps and sew them into a tube, closing off one end.
I never pin my straps before sewing but probably should...
Cut off the triangle at the corner so it will come to a point when you turn it right side out.
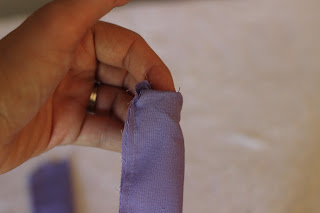
I always use my finger to start the turning process, and then use a long cat toy that we have (really technical, right?) to finish turning the tube.
Iron the tube flat so it looks more like a
strap and then make a triangle by pushing in the two ends towards each
other. The picture explains this a lot better than words can!
After both straps are ironed and made into a point, pin them to the top corners of the carrier and sew the outside edge of the carrier, but not the bottom.
After you sew the outside edge, flip the strap over and pin it down. I sew over this joint twice.
Sew the inside edge of the border (but again, don't sew the bottom).
You're over halfway done! The next step is to make the pleats in your carrier.
If your carrier is 9 inches, this step will be really easy. Otherwise, just do your best to find thirds.
For the 9" carrier, lay your ruler down and mark 3" and 6".
With the mark you made on the inside of this crease, make a fold in your fabric that is about 1 cm and pin.
Repeat this on the other mark you made as well.
Now you can see the little pouch for the doll or stuffed animal to sit in! Get your waist fabric and iron down the ends so you won't have any raw edges. I don't measure or do anything technical here. Just eyeball it.
Iron the strap in half, then open and iron down the sides. I've started making a triangle with the end of the strap instead of the box shape, but either way is fine.
Find the midpoint of your strap and put a pin in place to mark it. I
forgot to take pictures of the felt, but you're going to put it inside
of the waist band and center it. It will be behind the carrier panel. I fold the fabric edge over it and
then pin the waist band in place.

The final step is to sew the waist strap all the way around and you're done! Your toddler or child will have a way to carry their favorite doll or toy around.
The carrier straps can be crossed and tied around the waist instead. I prefer the bow in the back. Let me know how your carriers turn out!


No comments:
Post a Comment