Monday, September 16, 2013

Easiest way to sew armholes

When I first began sewing pillowcase dresses, I tried every way I saw to do armholes.  
One of my daughter's doll's shirts was coming undone one day so I went to fix it 
and saw how the arm holes were done on it.  Lightbulb moment!  
I copied that method and found the EASIEST way to do beautiful looking armholes.

To begin, cut a 1" strip of whatever fabric you plan to use.  This is your bias tape.  
It doesn't have to match because it won't show.  Iron in about 1/3 of the fabric.
Then line up the fabric with the edge of your armhole.  
You should be looking at the pretty side of your fabric.

I don't pin it in place, but I do leave a little bias tape above the dress. 
I also leave a small bit of the dress fabric showing to make sure I catch the entire egde.  
Sew along the entire armhole and then cut off the excess.


This part is hard to explain with words, but the pictures do a pretty good job. 
 You're going to flip the bias tape over your stitch and then 
hide the raw edges inside of the fold.


Flip it over once more and pin in place.


Continue along the entire edge and stitch as close to the edge of the bias tape as possible.


Now your armhole should look like this:


All done!

Thursday, September 12, 2013

Pleated cheerleading skirt

I had a special order for a football necklace shirt and made a test shirt for my daughter.
FSU colors are garnet (darker red) and gold so I went with gold thread.  
When it came time to make the skirt, I didn't know what to do! 
The two tier skirt wouldn't work because gold fabric is a no-go. 
I decided on gold ribbon and to make a cheerleader type of skirt.
I had no idea how cute it would be!!!


First, I had to find a matching fabric.  I got 24" (by 44") of the garnet color, 
a spool of white ribbon, and a spool of gold ribbon.  
I brought the shirt in with me to make sure it would match!


I layed out the ribbon in every configuration and finally decided on this. 


For a 2T/3T, cut two 9"x length of fabric for the front and back of the skirt and a 3" band for the waist.  You'll also need 17" of elastic.  Once your fabric is cut, mark every 1.5" along 
the top of the front.  You'll match up every other line and pin in place.


After the entire front is pleated and pinned, you'll want to add the back layer of fabric to where it will join on the inside of a pleat.  Undo the last pleat, sew your two fabrics together, and continue marking and pleating until you have 25" of pleated fabric.  Then pin the bottom of the pleats in place to keep the pleats in place while sewing.


Mark 3" down on every pleat.  This is the point you'll sew to.  
Do a straight stitch down each pleat to your 3" mark.  
Make sure to back stitch at the bottom so your stitch doesn't unravel.

Line up your waist band strip with the top of the skirt and sew in place.  
It's fine for it to be a little longer than the skirt.  You don't have to stitch it first.
Thread your 17" of elastic in to the band and pin the ends in place so they don't
get lost in the tube.  Sew the skirt ends together to make your skirt. 


I planned to sew ribbon along the bottom so I just hemmed up the bottom 
edge on the outside of the skirt.  The ribbon will hide that raw edge.


 Now the skirt is done except for the ribbon.  
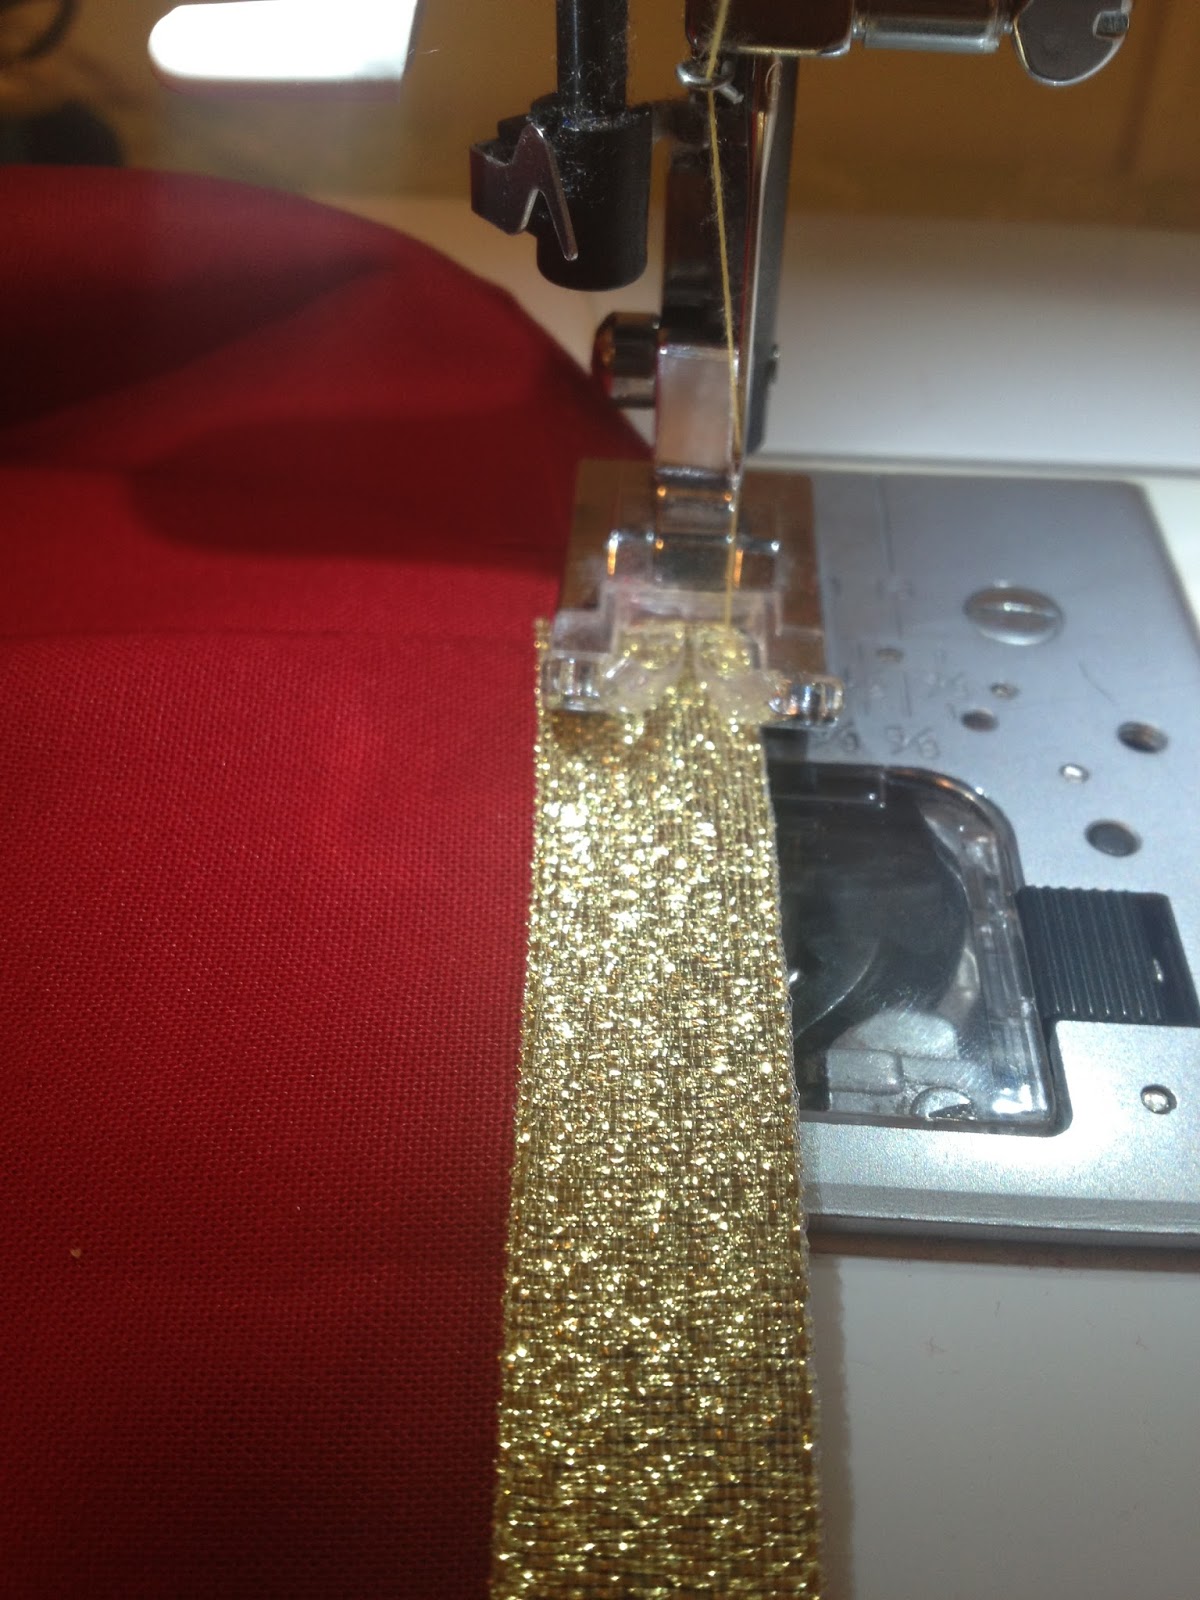
I held the ribbon in place to make sure it lined up with the bottom egde perfectly.  
With my sewing needle all the way to the right, I sewed the bottom of the gold in place.


When you get to the end of the ribbon, fold over the end and sew it down
so there are no raw edges.


Then sew the top edge of your bottom ribbon.  
I set my white ribbon placement based on the gold ribbon.  
With the needle all the way to the left, I made sure the edge of the sewing foot
 was just above the gold ribbon.


Sew the bottom and top of that ribbon.  Flip your skirt inside out and 
iron the pleats down again, especially where the ribbons are.  
The iron will burn ribbon if you touch the ribbon directly, so make sure
 you do this on the inside of the skirt!  

Before ironing:

After ironing:

I hope your little cheerleader loves the skirt you make!

Monday, September 2, 2013

Buggy's Busy Book

Did you ever decide to take on a project and then think you were insane for getting in to it?  That's what this busy book was all about.  In total, I spent over 40 hours working on this!  I'll explain a little of what I did in this post, but I made this before I had the blog and never intended for there to be a tutorial on it.

First, here is the cover.  The cover is stiffened/stabilized felt.  That helps it keep it's shape but still remains soft.  I embroidered the cover, sewed the edges, and sealed it with handmade bias tape.  The tab that buttons has stabilized felt on the inside and the outside is a fabric sleeve.  The handle is stabilized felt too. 


On the inside, there is a tag with our daughter's name and our contact information in case it is found by someone.  Heaven forbid we ever lose all this work!!!


The first page is a cat with a collar that buckles and unbuckles.  The red bell comes off as well but our daughter isn't able to do that yet.  I made this page by pinning a coloring sheet to the fabric and sewing right over it.  The pink in the ears, nose, and gray whiskers were done with DMC floss and the eyes were ironed on.  


The pages are double sided.  The back of the cat page is a caterpillar.  The numbers velcro on and can be put in the pouch for storage.


The next page is flowers that attach to buttons.  The object is matching the correct colors and the skill is buttoning and unbuttoning.  


The apple tree was one of the most challenging pages of all!  Each apple has a snap sewn to it and a matching apple glued to the top to hide the stitches.  Each snap was sewn to the tree.  The tree was attached with iron on fusible webbing.  That stuff it magical for a book like this!


The converse shoe was a challenge but SO worth it!  I mean, look how cute it is!!!  I started with a picture of a converse and sewed the parts of the shoe together.  I bought grommets and hammered them in place.  The entire shoe can be laced, unlaced, and tied.  The converse logo is ironed on.


Next was a simple page: weaving.  I should have made the strips smaller and not quite to the edge.

The hair page is one of my favorites.  I made a girl face and used fusible webbing to attach it.  The little pouch serves as a holder for the accessories and also kind of look like a shirt.  The hair is sewn in place under the bows but the long part hangs for our daughter to play with.  She's not in to this page yet but she'll grow in to it!


The car page is my daughter's FAVORITE!  I should have made the background green because it looks so drab to me, but oh well.  The road is attached with fusible webbing and I hand stitched the lines with DMC floss.  The garage provides storage for the car.  All of the signs are ironed on.


The clothes line is so darling.  The little clothes pins are from amazon.  I just cut basic clothes out of felt.  The clothes can be hung up or put in the laundry basket.


The camping page is for practicing zipping and unzipping.  There's nothing too special about it but it's cute!


The mailbox page is my daughter's second favorite.  There are letters in the mailbox written to her from her family.  Again, I used iron-on paper and printed the letters family wrote to her.  The "stamps" represent the writer's favorite thing.


Next to her mailbox is a writing tablet and a colored pencil.  


The final page is a tic tac toe board.  The pieces were buttons that I had as extras.  I melted the button part off the back so they would be flat.  


That's her book!  I hope she's able to use it and enjoy for MANY years to come.


Sunday, September 1, 2013

Two Tier Skirt tutorial

A friend ordered a dress from me and then decided she wanted a shirt and skirt instead.  
I found this tutorial and adjusted it to fit a 2 year old.   After the first two, 
I saw some things that I needed to adjust so here is MY tutorial.  
This is the skirt I made today.


And what it looks like with the shirt I also made.


For a 2T/3T skirt, you'll need:

Top layer band - 13" x 6"
Top layer ruffle - 20" x 6" (I just use the length of the fabric cut in half)
Bottom layer band - 13" x 4"
Bottom layer ruffle - 20" x 5"
Elastic - 18"

The first step after cutting the fabric is to sew the top bands together on one short edge to make one long piece.  Do that with the ruffle fabric too and finish the edges you sewed.  


Ruffle the ruffle by stitching with a very loose stitch and cinching the fabric.  
Pin the ruffle to the band with the seams out.  It helps to line up the middle seam first.


Sew the band and ruffle together a little inside the first stitch.
Then sew the other sides together to make a continuous loop and finish that seam.
It should look like a skirt at this point.  
Finish the bottom edge of the skirt layer.  Repeat all of these steps for the bottom tier.

Combining the layers is a little hard to explain, but I'll do my best.  
On the top layer, flip the band to the inside of the ruffle so that the seam is on the top.  
With the bottom layer INSIDE OUT, match the top edge with the seam of the top layer.

 
Once the bottom layer is in place, pin the side seams together and then pin the rest of the way around.  Sew the layers together.  Finish that edge and then flip the skirt right side out.


In order for the skirt to fit correctly, the front needs to be slightly lower than the back.  Fold the skirt in half so the middle seams line up.  Then mark 1" on the front of your skirt and draw a line from there to the top edge of the skirt.  Cut that off.


Now you'll sew a channel for the elastic to go through.  Make sure to leave an inch or two to put the elastic in!  Thread the elastic through your channel and make sure it isn't twisted on the inside.
Pin it together and then sew the elastic together.


Cut off the excess ends of the elastic and pull the waist of the skirt to get the elastic inside.  
Sew up the gap you left.  Your skirt is done!