Wednesday, October 19, 2016

Rainbow Brite costume

Years ago, I was Rainbow Brite for Halloween.  I decided to give that costume one last go and had my daughter dress as Twink to be my sidekick.  My husband even got in on the action and was dressed as the villain, Murky Dismal.  My daughter is now 5 and decided SHE wanted to be Rainbow Brite this year!  Her little sister will be Twink.

In the years since making my costume, I've had a lot of people ask me how I made it and I honestly couldn't tell them.  I made one for her this year and documented a lot of the process in hopes that it will help you all make one for yourself.

Mine was the first sewing project I ever took on but I think this is a pretty difficult project so I wouldn't recommend it for a beginner.

First, please forgive all of the white fluff in many of these pictures.  I sell my Twink costumes on etsy and this white fluff invades our house during the month of October.


I started with a blue dress that would fit her and used t-shirts in the colors I needed as well as white for the band and felt for the trim.


First, I measured the sleeve so I could make a new sleeve to sew in place of it.


The blue shirt happened to have long sleeves so I used it to to cut the new sleeve out.  Add an inch to the length and the width to account for the stuffing.


I divided the length of the sleeve by 5 to see how long each colored band should be.  My sleeve was 17" and I didn't want to make it complicated, so I chose 2" width and made the green one 5" to make up the difference.  The picture shows the 2" green band but I cut another after realizing it wasn't long enough.


Pin the first band onto the sleeve and sew.


Pin the second band over the edge of the first band and sew both in place.  Then flip the second band down, place the third band on top, pin and sew.  Repeat this process until all the bands are sewn on.


Cut off the side excess and sew along one edge.  Leave the bottom excess in place.  That is where the wrist band will be attached.


Very minimally stuff each color tube leaving about an inch free on both sides to sew it into a sleeve.


After the sleeve is sewn, flip it the right way and see how it fits on your dress.


I then cut the original sleeve off leaving about an inch of the sleeve to sew the new sleeve to.  With the dress inside out and the sleeve the correct way, pin the sleeve in place and sew around the sleeve to attach it.


I used the sleeve material to make the shoulder puffs.  I cut the largest half circle shape I could out of the sleeve fabric and used the blue t-shirt material for the underside.  Sew the two pieces together and lightly stuff.  Then pin and sew.


Find the midpoint of your sleeve puff and line it up with the shoulder seam of the dress.  Pin it in place.  The shoulder puff will need to be sewn on by hand.


I used 8" of fabric to make the white band along the bottom.  Sew the band in half and sew one end closed.  Then stuff it.  This will make the dress hold it's shape.  Once you get it to the same circumference as the dress, cut the end and sew the two ends together.


Pin the band in place and then sew it to the dress.


I used some red fabric sewn into strips to be the suspenders and belt, but I used ribbons for my original dress.  The yellow is felt.  I cut a little bit of the neckline to make the yellow sit straight across.  Sew the yellow felt into place and then pin the suspenders and belt in place.  The red will cover the edges of the yellow.  I sewed the red onto the front of the dress but stopped at the seams of the shoulders and sides.  The back is loose and attached with velcro.


I cut this shape for the wrist and hot glued it to the end of the sleeve, covering the showing stitches.


At this point, the only thing left is the felt stars for the end of the sleeves and the yellow band at the neck, as well as the rainbow for the belt.

Rainbow Brite's belt only has 3 colors so I found a 6 color rainbow outline and used it as a template but used two bands for each pattern.  I hot glued the bands to a red piece of felt and then glued that in place on the costume.  I also hot glued the stars in place.

The final piece is the shoes.  I took a trip to a local thrift store in search of some chunky shoes that I didn't mind ruining and found these.


I then painted them red (top) and yellow (bottom) and added black stripes in the yellow.  I was going to paint the straps orange but it wasn't working very well, so I ended up hot gluing felt to the straps instead and glued a star to the end.


The only thing left to do was the leg warmers which I did in the same method as the arm bands.  Any fabrics used for the leg warmers should be stretchy.  My top band was originally white non-stretchy fabric but I tore out that seam and used a white t-shirt instead.  Each leg band is 3" tall and a half inch longer than my daughter's calf was.  They are lightly stuffed and sewn together in the same way as the arm bands were.  It's best to use a white t-shirt for back fabric of the leg warmers.


She is very happy with her completed costume, and I can't wait until Halloween!


DIY mermaid tail for the pool

I found a little bit of fabric at JoAnns and bought it, planning to make a mermaid blanket for my daughter.  She saw the fabric and begged for a mermaid tail.  There are many tutorials online for how to make them so I looked around and combined the ideas I saw.  The total cost of this tail was $8.


It would be best to buy a fin but I didn't want to spend the money on one without knowing if she could swim with one, so I decided to make my own.  To make one, you'll need a firm plastic (I used a sterlite storage tub), stretchy fabric, elastic, and velcro.

First, I printed some mermaid tail fins and found one I liked.  I traced it on the tub and cut it with a jigsaw.  I then sanded the edges.


I had my daughter stand on the edge and traced where her feet would be.  The rectangle is where I wanted to add the foot strap.  


I sewed the fabric to cover her feet and made it twice as long as the rectangle on the front.  I added strap to the back with elastic inside to keep it around her ankle.


I drilled holes in the corners of the rectangle to keep the plastic from splitting, and then cut along the lines so I could insert the fabric foot strap.  I sewed velcro on the ends of the foot strap so that it could be adjusted and removed if needed.  Then I wove it through the slits and tried it on myself.  


I think it would be better to make the part by the feet more narrow so it's easier to flip in the water.

At this point, I followed the other patterns I found.  I traced my daughter's body from the belly button down to her toes and traced the fin as well.


I didn't have enough fabric to do one solid piece all the way down so I cut the fun pieces separately and sewed them on.


After both sides are cut and sewn, pin them together and sew all but the end of the fin.  Leave that open so you can slip the fin in.  I cut mine to the shape of the fin on the bottom and that made it rather loose once it was in the water.  I've seen a lot of tutorials where they leave the bottom straight and that works a lot better.  I ended up adding a zipper to this one later on.


After you sew it, slip the fin in and allow your little mermaid to try it on!  I ended up having to cut some excess off of the foot strap to make it tighter but she was able to swim in it pretty well.


Friday, July 10, 2015

Hot Air Balloon Mobile Tutorial

When I found out I was having a baby girl, I searched Pinterest for nursery ideas and saw this STUNNING hot air balloon mobile.  Then I clicked the link and saw the price.  I knew the only way I'd get one is if I made it myself.  The woman who makes them is so incredibly talented and I love all of her mobiles.  They're just perfect.  Here is her shop.  

I found some tutorials online that included templates (yay!) and decided to give it a go.  The template didn't work so I had to alter it, but it was great to have a starting point.  


Here is my template.  The finished balloons are about 3" wide x 5.5" tall before adding the trim.
If you want larger balloons, you can enlarge the template.

Materials needed:  
What do you have?  I ask because I used practically everything in my craft room!

Fabric (8" by 24" is plenty for one balloon)
fabric/craft glue
hot glue gun
brown textured cardstock (baskets)
fleece (clouds)
jute/twine/string
bottle caps
Anything you want to embellish with


After you print and cut your template pieces, cut 8 shapes from your fabric for your balloon.  I folded my fabric so I could cut 4 at a time.  Because my fabric had lines, I made sure they were all perfectly lined up and pinned the fabric before cutting.  


Take two pieces and pin them right sides together.  Sew along one edge (I left about 1/4" seam allowance) and be sure to backstitch on both ends.  Do not sew along the bottom.


After you have done all four pairs, pin and sew two together to make a panel of four.  Again, right sides together.  It's important to keep your stripes lined up if you have a striped fabric.


Now that you have two panels, join them together (right sides in) and pin.


I sewed all the others from top to bottom, but this piece, I sewed all the way around.
Be sure to backstitch the ends!  Turn it right side out.


Now you're ready to stuff it!  It's best to go slowly and use smaller pieces.  My first few were understuffed.  I think it's best to stuff them until you can't stuff anymore!


I grabbed a spool of thread and saw it was about the same circumference as my balloon opening, so I traced that on some stiffened felt.  For the non-gray balloons, I glued fabric to the felt so it would match.  Then I hand-sewed it to the bottom, tucking the raw edges in as I went.  The first few, I sewed the raw edges in by hand then sewed the bottom on.


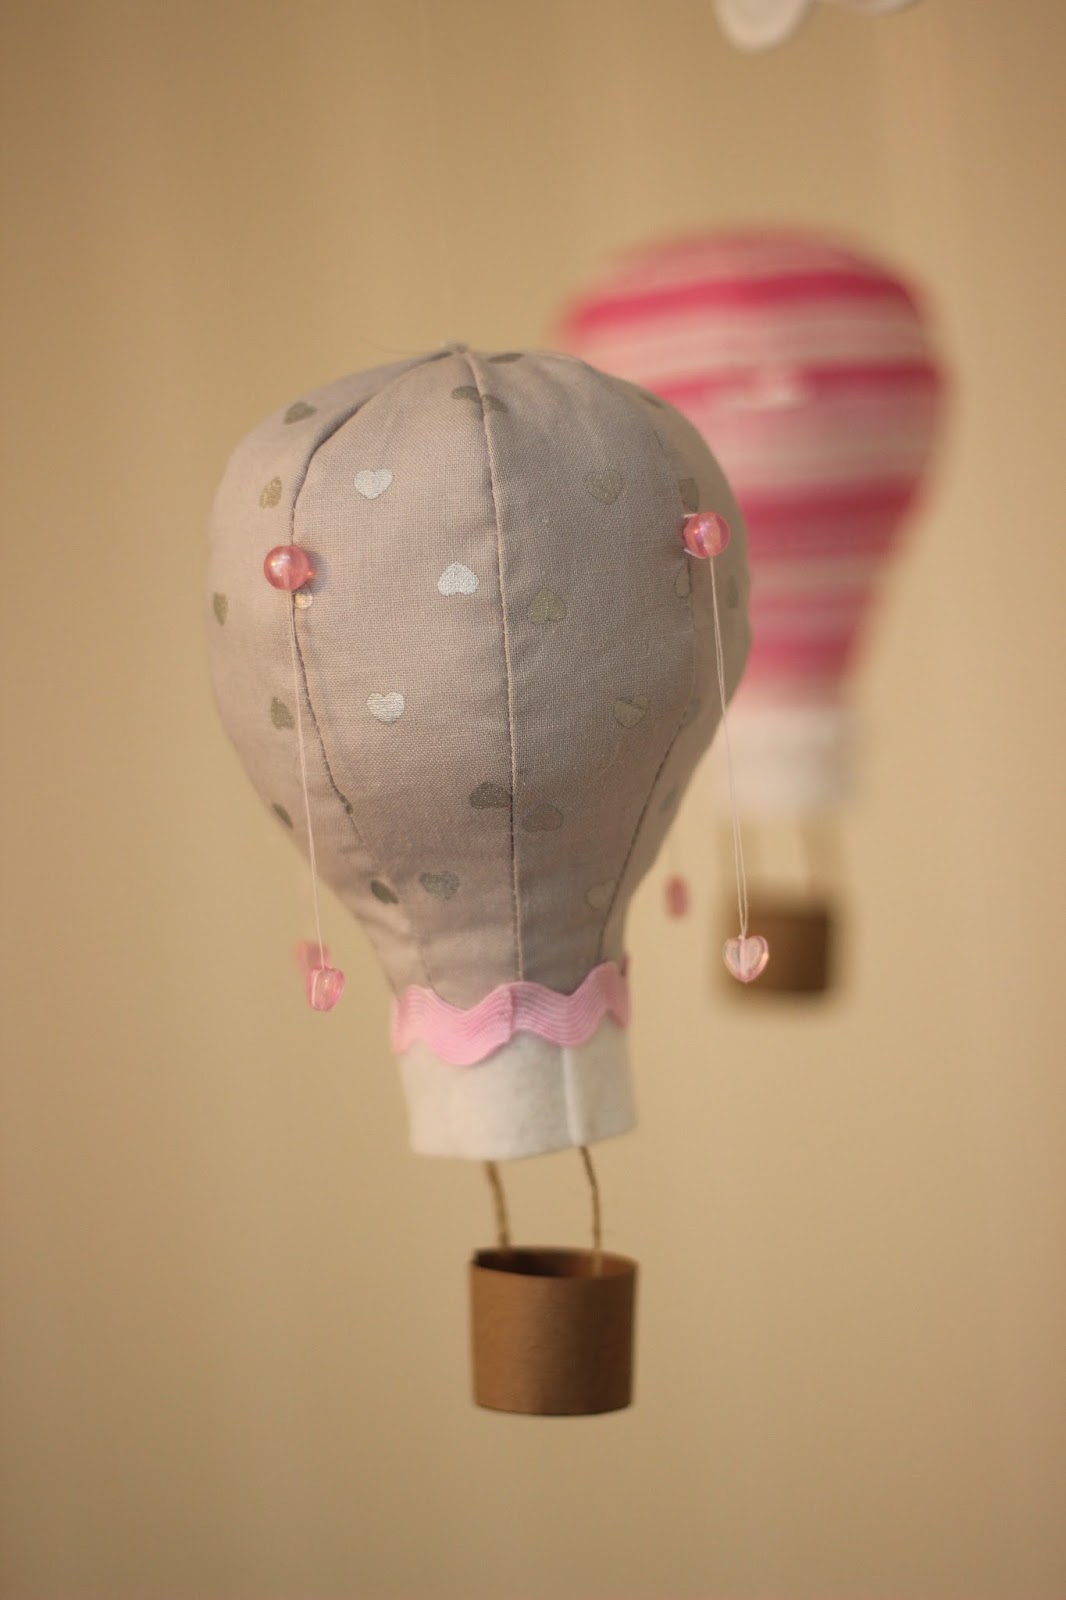
Now it's basically done!  I cut a 1" x 4.25" strip of white felt and glued it to the bottom.


After this, I decorated the balloons.  You don't HAVE to do that, and honestly, it took longer than making the darn balloons!  But, I think it adds a lot.  Just as a tip, place pins where you plan to put your embellishments.  This will let you see if they're lined up before you stitch anything.  
Ask me why this matters...  ;)  The trim around the felt is also glued on.


The baskets are tricky.  My mother in law is actually crocheting baskets for me but I couldn't just leave this unfinished!  Because it's temporary, I went with cheap and easy.


Basically, I took a bottle cap and hot glued a piece of textured cardstock to it.  Then I hot glued a circle of it to the bottom and glued some 2.5" jute strings on the sides.  Tie knots in your string before gluing it.  The little square of paper on the inside allowed me to sandwich the jute string in the glue.


Starting with the shorter of the two strings (assuming yours aren't even either), sew it to the bottom of the felt.  Hold the other string in place until the basket is level and sew it in place too.  


Now we have baskets!  Here are my finished balloons.


I didn't take pictures of the clouds being made, but they were incredibly easy.  I made them with fleece.  Cut out two pieces, pin them together, and sew 1/4" in from the edges.  When you have only an inch or so left, keep it on the machine with the needle down and lift the presser foot.   Now you can stuff the cloud without removing it from the machine!  Once it's stuffed, finish stitching around.


This is the baby's view.  I think I prefer it to the door view!


I'm no expert on how to make the mobile cross thing.  I cut a 3/8" x 36" dowel in half and hot glued them in an X shape.  Then I wrapped a ton of fishing line around the joint.  I sewed fishing line into the top of each balloon, tied it off, and then tied the other end to the dowels.  Total cost for this project was less than $8, but it took quite a bit of time.

I hope this tutorial helps you make a fabulous mobile for your room!