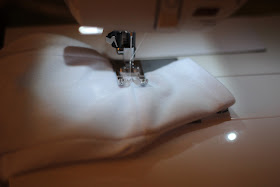
I bought a baby doll for my daughter and it had been, um, well loved. I knew it needed a new body so I took off the vinyl limbs and cut the cloth body apart. I used those pieces to make a pattern and then pinned those to suede cloth. Suede cloth is amazingly soft, doesn't stain easily, and doesn't fray so it's great for doll bodies.
Here are the pattern pieces I made. I used card stock to trace and then added seam allowances.
The first seam I sewed was the middle of the belly. Then I pinned and sewed the front of the legs in place.
Pin
and sew the doll's bottom on to the back and then pin the front and
back together. Sew the sides together but leave about 1 1/2" at the top
for the arms.
Sew
the arms to create a tube and then fold down one end to create a tunnel
the zip tie or string can run through. Sew that in place.
After that,
turn the tube right side out and fold it like below.
Place the arm into the space you left and pin in place. Sew up the side and the shoulders. Repeat with the opposite arm.
Now sew the crotch together and turn up the ends of the legs (like you did with the arms) to create a tunnel for the zip ties. Your body is almost complete. Turn it right side out.
Take the neck piece and fold one end over. Fold it in half and pin it on the outside of the body so all of the raw edges are together.
Sew on the neck piece. When you get to the end, fold it over so the two ends meet but raw edges won't show.
The last step is to sew over the leg seams. This step isn't necessary but it will allow the legs to move freely. If you don't sew them, the doll's legs will always be in the sitting position. It's up to you.
You're done! The doll body is ready to be stuffed and limbs can be added.
Friday, December 14, 2012
Suck pads for a Kinderpack
I have seen suck pads before and have considered making them. I guess I thought it was going to be too difficult, but this took me less than 45 minutes!
You can make these using any fabric and they will work on any
soft structured carriers, like Ergo, Boba, Kinderpack, Bamberoo, etc.
You can make these using any fabric and they will work on any
soft structured carriers, like Ergo, Boba, Kinderpack, Bamberoo, etc.
Supplies needed:
Patterned fabric (at least 21" by 13")
Fleece, chenille, or another fluffy fabric (also 21" by 13")
Optional: layer of flannel for the inside
Optional: layer of flannel for the inside
16" of velcro (8" of each side)
To begin, use something to measure around your carrier's strap. Mine was 8 1/2". Add 1 1/2" to that for your pattern's width and make a template using a piece of paper. My pattern is 10" wide by 6" tall. Fold your fabric in half to pin in place and cut out both at once. Use the template to also cut out the fleece or other fluffy layer.
Now that your pieces are cut out, lay the patterned piece, wrong side down, on the fleece and pin in place. If you're going to add flannel, it should be added to the outside to make sure it will be on the inside when flipped.
Sew around the edges but leave a small space on one end to flip it right side out. After you sew it, flip it the right way and use something to push the corners out. It would be a good idea to make the seam on the end with the hole a little longer so the top stitch will catch it when folded.
Pin the hole to make sure it will stay closed, and then pin the rest of the way around to make sure the fabric doesn't shirt while top stitching. Top stitch the suck pad and cut out velco that is 4" long for each end.
If the end with the hole doesn't look very pretty (like mine above), you should make that end the one that will be on the inside when the velcro is closed. I should have done mine the other way around. Pin the velcro in place and test to make sure it will
close the way you want it to. Sew the velcro in place and admire your
work!
Two suck pads to keep your straps dry, keep your baby content, and add some pizazz to your carrier! I saw another tutorial to add a loop to the straps so you can attach toys or a pacifier clip. That's a fantastic idea and this is how she did it.


